Trick of Trade: Alternative to a Pressure Bag for IV Fluids

pressure bag IV fluids
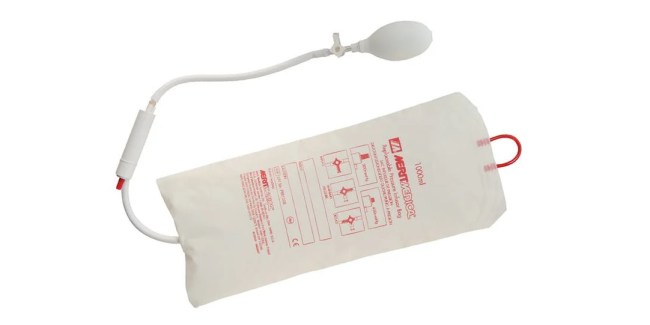
You have a severely dehydrated patient with a peripheral IV line, requiring urgent fluid resuscitation. However, the crystalloid fluids are not flowing freely. Multiple attempts were made to place this line with the latest having a flash of blood return and a smoothly flowing saline flush. You can not seem to find your pressure infusion cuff to squeeze the IV bag and accelerate fluid administration.

Trick of the Trade: Manually provide positive pressure fluids using a 3-way stopcock

  1. Attach a 3-way stopcock between the angiocatheter and IV tubing.
  2. In the unused port, attach a 10 or 20 cc syringe.
  3. Fill the syringe with fluids from the IV bag (turn off flow to the angiocatheter using the stopcock)

Trick of the trade stopcock pressure infusion IV fluids syringe start

  1. Rotate the stopcock 180-degrees and push the syringe fluid into the angiocatheter.

Trick of the trade stopcock pressure infusion end

  1. Repeat this process several times.
  2. After manually pushing 100-200 cc of fluid through the line, turn the stopcock to shut off the syringe port. The fluids should flow more rapidly with gravity alone.

Word of Caution: Syringe Fluid Contaminant

Thanks to Twitter feedback from @cpatrick_89, be careful of introducing bacteria when attaching these pieces to the IV tubing, based on an in vitro study. Wearing gloves helped reduce bacterial contamination [1].

Note that conventional pressure bags may not be readily available in emergency departments and could blow the line you worked hard to secure. This “gentle pressure” technique allows the clinician to gauge how much positive pressure to administer to minimize the risk of fluid extravasation.

Interested in Other Tricks of the Trade?

Reference

  1. Kawakami Y, Tagami T. Pumping infusions with a syringe may cause contamination of the fluid in the syringe. Sci Rep. 2021;11(1):15421. Published 2021 Jul 29. doi:10.1038/s41598-021-94740-1

Trick of Trade: Inflating the Esophageal Balloon of a Blakemore/Minnesota Tube without a Manometer 

esophageal balloon manometer trick minnesota blackmore tube

A heavy alcohol drinker, who is well known to your Emergency Department, presents with altered mental status, except that he looks different this time. He looks really bad, stating that he has been vomiting blood. He is hypotensive. He then vomits a copious amount of blood right in front of you. You intubate the patient and initiate the massive transfusion protocol, but everything you pour into him seemingly comes right back out. The gastroenterologist on-call states that he is too unstable for endoscopy. It is time for a balloon tamponade device. You’ve trained for this and set up everything. You call the respiratory therapists (RT) for this mystical “manometer” that you have seen in instructional videos, except that they look puzzled by your request. It is time to MacGyver a method that allows you to know the esophageal balloon pressure that you are generating to avoid an esophageal rupture.

esophageal balloon devices linton sengstaken blakemore minnesota tube

Esophageal Balloon Tamponade Devices – Linton-Nachlas, Sengstaken-Blakemore, Minnesota Tubes (image courtesy of Dr. Mark Ramzy at REBEL EM)

What are esophageal balloon tamponade devices?

There are 2 commonly used devices for tamponading the esophagus during a variceal bleed, the Sengstaken-Blakemore (SB) tube and the Minnesota tube. There is also the Linton-Nachlas tube, but that only has a gastric balloon. The SB tube was created in 1950 in order to help tamponade variceal bleeds [1]. It is a 3-lumen device that has ports to inflate the gastric balloon, aspirate gastric contents, and inflate an esophageal balloon. The Minnesota tube was developed later as a variation to the SB tube and contains an additional port and lumen for aspirating esophageal contents [2]. Another minor difference is that the gastric balloon in the Minnesota tube holds 450-500 ccs of air, while the SB gastric balloon holds 250 ccs of air [2].

Indication: The uncontrolled hemorrhage from esophageal or gastric variceal bleeding after medical or endoscopic treatment fails, is not available, or is not technically possible [3, 4].

Contraindications [4]:

  • Unprotected airway
  • Esophageal rupture (Boerhaave’s syndrome)
  • Esophageal stricture
  • Uncertainty of bleeding site
  • Well-controlled variceal bleeding

Esophageal balloon tamponade devices achieve hemostasis in 60-90% of cases; however, they are only a temporary measure of hemorrhage control because over 50% of variceal bleeds rebleed after deflation [5].

How do you insert these esophageal tamponade devices?

The following instructions are for inserting a Sengstaken-Blakemore (SB) tube [3, 6]:

  1. Pre-measure 50 cm above the gastric balloon and esophageal balloon and mark them on the SB tube.
  2. Fully lubricate the tube.
  3. Insert the tube similar to an orogastric tube until you have reached the 50 cm mark for the gastric balloon
    • Additional trick: You can insert it with a nasogastric tube to have more rigidity and make inserting the tube easier.
  4. Use a slip syringe at the gastric aspiration site and auscultate to confirm that you are in the stomach. Then fill the gastric balloon with 50 cc of air.
  5. Verify the placement of the gastric balloon with a chest x-ray.
    • Additional trick: If the x-ray is delayed, you can pre-check with ultrasound [7]. However final confirmation prior to full inflation should be with a chest X-ray.
  6. Fully inflate the gastric balloon with 200 more ccs of air for a total of 250 ccs.
    • The Minnesota tubes should have the gastric balloon inflated to 450-500 ccs.
  7. Apply traction to the tube by tying a roller bandage to the end of it and then the other end to a 1 L bag of IV fluids. Then hang the roller bandage over an IV pole.
  8. Place the nasogastric tube down to the pre-measured level above the gastric balloon and suction the esophageal space. If there is continued bleeding coming from the nasogastric tube then you will need to inflate the esophageal balloon.
    • Note that Minnesota tubes already have their own esophageal suction port and will NOT need this NG tube placement to suction the esophagus.
  9. Use a “manometer” to inflate the esophageal balloon to 30 mmHg. If bleeding persists, you can go to a maximum of 45 mmHg.

What is this “manometer” typically used for the esophageal balloon?

The manometer referenced in numerous videos [6, 8] is actually a cuff manometer, or pressure gauge, to measure endotracheal cuff pressures. Hence, the RT’s are supposed to have them. In our emergency department, the RTs do not spend a lot of time going around measuring cuff pressures and usually save that until the patient reaches the ICU. It is convenient to use for the inflation of the esophageal balloon because it can inflate and measure pressure at the same time.

Pearl 1: Check the units of pressure being used. Manometers often use cmH2O, while esophageal balloons use mmHg.

  • The conversion rate is: 1 cmH2O = 0.74 mmHg
  • The esophageal balloon goal of 30-45 mmHg is approximately 40-60 cm H2O.

Pearl 2: While the gastric balloon sets a target VOLUME, the esophageal balloon sets a target PRESSURE.

Trick of the Trade: Use a sphygmomanometer as the manometer

Once the inflated gastric balloon is confirmed to be in place, it is time to inflate the esophageal balloon. A manual blood pressure instrument can be repurposed to inflate and measure the esophageal balloon pressure.

  1. Take your manual blood pressure cuff and detach the connections so you have only a plastic tube that runs to the pressure gauge.
  2. Connect this plastic tube end to the male Luer lock of a 3-way stopcock.
  3. Connect the esophageal balloon to a female luer lock on the 3-way stopcock.
  4. Place a 50 cc syringe on the final female Luer lock of the 3-way stopcock.
  5. Turn the 3-way stopcock off towards the pressure gauge and inflate the esophageal balloon with 10 ccs of air.
  6. Then turn the 3-way stopcock off towards the syringe and you should have a reading on the pressure gauge.
  7. Repeat this using small increments (we chose 10 ccs) until you have a pressure reading of 30 mmHg on the pressure gauge. If bleeding continues, you can increase to 45 mmHg.

Video Demonstration: Esophageal Balloon Inflation

References

  1. Sengstaken RW, Blakemore AH. Balloon tamponage for the control of hemorrhage from esophageal varices. Ann Surg. 1950 May;131(5):781-9. doi: 10.1097/00000658-195005000-00017. PMID: 15411151; PMCID: PMC1616705.
  2. Nickson C. Sengstaken–Blakemore and Minnesota Tubes. Life in the Fast Lane • LITFL. Published January 30, 2019.
  3. Powell M, Journey JD. Sengstaken-Blakemore Tube. [Updated 2022 Jun 5]. In: StatPearls [Internet]. Treasure Island (FL): StatPearls Publishing; 2023 Jan-.
  4. Yartsev A. Sengstaken-Blakemore, Minnesotta and Linton-Nachlas tubes. Deranged Physiology. Published July 13, 2015. Accessed April 6, 2023.
  5. García-Pagán JC, Reverter E, Abraldes JG, Bosch J. Acute variceal bleeding. Semin Respir Crit Care Med. 2012 Feb;33(1):46-54.
  6. Mason J. Placement of a Blakemore Tube for Bleeding Varices. EM:RAP HD Videos. Accessed December 17, 2021.
  7. Farkas J. PulmCrit Wee: Ultrasound-guided blakemore tube placement. EMCrit Project. Published May 4, 2016. Accessed April 6, 2023.
  8. Roohollahi A, Suleiman Bilal Rana H, Hadique S. Blakemore Tube Insertion – BAVLS. American Thoracic Society. Published June 1, 2020. Accessed April 7, 2023.

ALiEM AIR Series | Procedures Module

ALiEM AIR Series: Procedures 2023

Welcome to the AIR Procedures Module! After carefully reviewing all relevant posts in the past 12 months from the top 50 sites of the Social Media Index, the ALiEM AIR Team is proud to present the highest quality online content related to related to procedures in the Emergency Department. 6 blog posts met our standard of online excellence and were approved for residency training by the AIR Series Board. More specifically, we identified 2 AIR and 4 Honorable Mentions. We recommend programs give 3 hours of III credit for this module.

AIR Stamp of Approval and Honorable Mentions

In an effort to truly emphasize the highest quality posts, we have 2 subsets of recommended resources. The AIR stamp of approval is awarded only to posts scoring above a strict scoring cut-off of ≥30 points (out of 35 total), based on our scoring instrument. The other subset is for “Honorable Mention” posts. These posts have been flagged by and agreed upon by AIR Board members as worthwhile, accurate, unbiased, and appropriately referenced despite an average score.

Take the AIR Procedures Module at ALiEMU

Interested in taking the AIR quiz for fun or asynchronous (Individualized Interactive Instruction) credit? Please go to the above link. You will need to create a free, 1-time login account.

Highlighted Quality Posts: Procedures

SiteArticleAuthorDateLabel
Rebel EMIntra Articular Lidocaine vs Sedation in Shoulder ReductionsNordia Matthews, MD30 Jan 2023AIR
EM DocsVideo Laryngoscopy in the EDCameron Jones, MD8 Aug 2022AIR
First 10 EMLacerations: Does closure technique matter?Justin Morgenstern, MD28 Nov 2022HM
DFTBRegional nerve blocks moduleNicola Mulrooney, MD7 Dec 2022HM
EM DocsUltrasound Guided Regional Anesthesia for Hip FracturesOlivia Victoriano, MD and Jacob Avila, MD5 Dec 2022HM
Core EMUltrasound Guided Lumbar PuncturesAaron Bola, MD31 Mar 2022HM

(AIR = Approved Instructional Resource; HM = Honorable Mention)


If you have any questions or comments on the AIR series, or this AIR module, please contact us! More in-depth information regarding the Social Media Index.

Thank you to the Society of Academic Emergency Medicine (SAEM) and the Council of EM Residency Directors (CORD) for jointly sponsoring the AIR Series! We are thrilled to partner with both on shaping the future of medical education.

Trick of the Trade: Chest tube rewarming with Foley tubing connector

You have a pulseless hypothermic patient requiring aggressive internal rewarming. ECMO is not available, and you’ve made the decision to initiate thoracic lavage. After placing your chest tubes, you step back triumphantly, but in short order, the nurse hands you large diameter IV tubing with warmed fluids so that you can connect it to the chest tube. You are left with the IV tubing in one hand and a chest tube in the other with no time to waste, but no elegant or straightforward solution to interface the two.

Trick of the Trade

Using Foley bag tubing

The tube from a standard Foley bag, available in all emergency departments, contains a Luer lock near the tapered nozzle. This unique connector setup allows you to instill warm fluids into the thoracic space with minimal spillage.

rewarming hypothermia IV tubing chest tube foley tubing

Technique for Rewarming

  1. Attach the warmed IV fluids to the Luer lock port on the Foley bag tubing.
  2. Insert the tapered nozzle on the Foley bag tubing (typically interfaces with the urine drainage port of the Foley catheter) into the chest tube.
  3. Clamp the remainder of the Foley bag tubing just proximal to the Luer lock to minimize backflow of IV fluids into the bag.
  4. Optional: Cut the tubing proximal to the clamp to declutter the space around the interface.
  5. Instill warm fluid through one chest tube and drain it from the adjacent chest tube.
  6. Continue rewarming resuscitation protocols.
Chest tube connected to IV tubing via Foley bag tubing

IV tubing connected to chest tube via Foley bag tube (left photo is a closeup view with arrow designating IV fluid flow)

Read other Tricks of the Trade posts.

SAEM Clinical Images Series: Found Down

found down

A 67-year-old caucasian male experiencing homelessness was “found down” in a parking lot. EMS reported that he had a GCS of 6 with a systolic blood pressure in the 80’s, finger stick glucose of 100, and no response to intranasal naloxone. He was intubated in the field and arrived to the emergency department unresponsive with a BP of 95/60, HR 125, T 38°C, and O2 Sat 100%. Hemodynamic stabilization was achieved with central venous access, and laboratory and imaging studies for the evaluation of altered mental status ensued.

General: Disheveled male

HEENT: Normocephalic; PERRLA 3-2 mm; dried blood in nares

Skin: Warm; dry; no visible signs of trauma

Cardiovascular: Tachycardic with no murmurs, rubs, or gallops

Respiratory: Bilateral breath sounds on ventilator; diffuse rales

Gastrointestinal: Soft; non-distended; bowel sounds present

Musculoskeletal: No deformities

Neurologic: Unresponsive; GCS 3

COVID-19 rapid antigen: Detected

Complete Blood Count (CBC): WBC 17 k; Hemoglobin 15; Platelets 185

Comprehensive Metabolic Panel (CMP): Na 133; K 4.6; Cl 91; CO2 21; BUN 18; Cr 2.2; Ca 8.4; Alb 2.1; Tbili 0.4; Alk phos 112; AST 242; ALT 68

ABG on FiO2 100%: 6.99/>95/405/23/100%

Lactate: 16.4

Ammonia: 90

CK total: 716

Trop I HS: 809

PT: 14

INR: 1.05

PTT: 45

Urinalysis: Unremarkable

EtOH, Acetaminophen, Salicylate: Negative

UDS: Negative

Chest Radiograph: Diffuse ground-glass opacities

Air embolism to the right ventricle and pulmonary artery. As little as 20 mL or less of air rapidly infused may cause obstruction, ischemia, and hemodynamic collapse.

Risk factors include central venous catheterization, lung trauma, ventilator usage, hemodialysis, surgery (esp. coronary, neurosurgery), childbirth, and scuba diving barotrauma.

Take-Home Points

  • In the appropriate clinical scenario, especially those involving respiratory, cardiac, and neurologic findings where invasive procedures were utilized, the diagnosis of venous air embolism should be entertained.
  • Immediate management of an air embolism involves administration of 100% oxygen by nonrebreather mask (NRM) or ventilator and placement of the patient in the left lateral decubitus (Durant maneuver) and Trendelenburg positions. Hyperbaric oxygen therapy has also been used if there is no clinical improvement.
  • The purpose of the Durant maneuver and Trendelenburg position is to trap air along the lateral right ventricular wall, preventing right ventricular outflow obstruction and embolization into the pulmonary circulation.

  • Gordy S, Rowell S. Vascular air embolism. International Journal of Critical Illness and Injury Science. 2013;3(1):73. doi:10.4103/2229-5151.109428 Malik N, Claus PL, Illman JE, Kligerman SJ, Moynagh MR, Levin DL, Woodrum DA, Arani A, Arunachalam SP, Araoz PA. Air embolism: diagnosis and management. Future Cardiol. 2017 Jul;13(4):365-378. doi: 10.2217/fca-2017-0015. Epub 2017 Jun 23. PMID: 28644058.

Trick of the Trade: A “Fiberbougie” through a supraglottic airway device (King tube)

king tubeResuscitation before intubation is a critical construct in modern emergency medicine. The prevention of peri-intubation arrest by correcting pre-intubation hypoxia, hypotension, and acidosis is often easier said than done. Worse yet, the intubation process itself, especially if difficult, can worsen hypoxia and hypotension which is often unrecoverable [1, 2] Supraglottic devices, such as a King Airway or laryngeal mask airway, can be placed quickly, and they effectively oxygenate and ventilate patients with a high degree of success [3]. Unfortunately, when the King (or similar device) is exchanged for an endotracheal tube, success is far from guaranteed. Ideally the King could be blindly changed over a tube exchanger however it is quite easy to lose the airway completely during this process. We describe a potentially safer and more effective alternative.

Trick of the Trade

After a patient is stabilized after initial resuscitation, the supraglottic King airway device should be exchanged. A disposable, single-patient-use bronchoscope can serve as a bougie-like guide.

equipment fiberbougie king

Equipment Needed

  • Disposable bronchoscope
  • Endotracheal tube
  • 50 mL syringe
  • Laryngoscope (video or direct)
  • Trauma shears
  • Suction
  • Capnography

fiberbougie through supraglottic device king airway

Left: Demonstrating the technique inserting a single-use bronchoscope through a supraglottic King tube in a simulation patient. Right: Corresponding view of the vocal cords through the King side port in a real patient.

Description of the Trick

  1. Insert a disposable bronchoscope through the airway port of the King airway
  2. Guide the bronchoscope to exit through the side port of the King and into the trachea until you approach the carina
  3. Cut the disposable bronchoscope at the level of the handle, leaving a “fiberbougie” in the trachea above the carina
  4. Remove the King airway over the cut fiberscope in a modified Seldinger technique while suctioning airway
  5. Insert the endotracheal tube over the “fiberbougie”
  6. Use video or direct laryngoscopy to visualize the tube sliding over the “fiberbougie” into cords
  7. Confirm placement with capnography and/or with direct visualization and x-ray

bronch bougie equipment

Insertion of the endotracheal tube over the “fiberbougie” with video laryngoscopy confirmation with a simulation patient. The inset image was captured from a Glidescope on a real patient during the exchange.


Video Tutorial of the Fiberbougie Technique to Exchange a King Tube


References

  1. April MD, Arana A, Reynolds JC, et al. Peri-intubation cardiac arrest in the Emergency Department: A National Emergency Airway Registry (NEAR) study. Resuscitation. 2021;162:403-411. doi:10.1016/j.resuscitation.2021.02.039. PMID 33684505
  2. Russotto V, Tassistro E, Myatra SN, et al. Peri-intubation Cardiovascular Collapse in Critically Ill Patients: Insights from the INTUBE Study [published online ahead of print, 2022 May 10]. Am J Respir Crit Care Med. 2022. doi:10.1164/rccm.202111-2575OC. PMID 35536310
  3. Burns JB Jr, Branson R, Barnes SL, Tsuei BJ. Emergency airway placement by EMS providers: comparison between the King LT supralaryngeal airway and endotracheal intubation. Prehosp Disaster Med. 2010;25(1):92-95. doi:10.1017/s1049023x00007743. PMID 20405470 

Trick of Trade: Large-Bore Endotracheal Tube To Suction the Occluded Airway

vomit suction emesis pumpkin

The paramedics just arrived with a new patient to the resuscitation room. You find an altered patient actively vomiting bloody vomitus and food particles. You prepare for a difficult airway. You prepare 2 Yankauer suction catheters, but you are still worried that the food particles may clog up the catheters. Is there a better alternative?

Background

Up to 44% of emergent intubations are complicated by blood, vomit, or food particles in the airway. It has been shown that contaminated airways may lead to multiple intubation attempts and are associated with poor outcomes, such as peri-intubation cardiac arrest [1, 2].

The Yankauer suction catheter is the most commonly available tool in the Emergency Department to remove foreign particles, but performs poorly when compared to larger-bore catheters [3]. The Yankauer was made initially for surgical field management, with small holes at the tip to gently remove (or become clogged with) debris without damaging tissue. Some standard Yankauer designs have a built-in safety vent hole on the shaft, which if unoccluded, renders the device virtually useless [2]. This protective equipment design does not offer maximum help during emergent large-volume regurgitation dirty airway management.

Alternatively, there is the DuCanto suction catheter. It is a specialized and more expensive large-bore version of the Yankauer; however, it is not as readily available and more expensive [1].

Trick of the Trade: Use a large-bore endotracheal tube as a rigid suction catheter

A large-bore, such as a size 10.0, endotracheal tube can serve as a rigid suction catheter. Note the diameter sizes of the Yankauer, DuCanto, and 10.0 endotracheal tube below.

Suction devices (inner diameter):
Yankauer (3.56 mm), DuCanto (6.6 mm), 10.0 endotracheal tube (10 mm)
  • Materials needed
    1. Size 10.0 endotracheal tube (or the largest size you have)
    2. Suction tubing and canister
  • Making the device
    1. Insert the rubber end of the suction tubing over the plastic endotracheal tube adaptor
    2. Attach suction tubing to the canister
    3. Turn suction on

Video Demonstration: Yankauer vs Large-Bore Endotracheal Tube

Editorial Note: If the rigidity of the catheter is less important, you can also insert the soft suction tubing directly into the airway to remove contents.

Read other Tricks of the Trade posts on ALiEM.

References:

  1. Nikolla DA, Heslin A, King B, Carlson JN. Comparison of suction rates between a standard Yankauer and make-shift large bore suction catheters using a meconium aspirator and various sized endotracheal tubes. J Clin Anesth. 2021 Sep;72:110262. doi: 10.1016/j.jclinane.2021.110262. PMID 33839435
  2. Hasegawa K, Shigemitsu K, Hagiwara Y, et al. Association between repeated intubation attempts and adverse events in emergency departments: an analysis of a multicenter prospective observational study. Ann Emerg Med. 2012;60(6):749-754.e2. doi:10.1016/j.annemergmed.2012.04.005. PMID 22542734
  3. Andreae MC, Cox RD, Shy BD, et al. 319 Yankauer Outperformed by Alternative Suction Devices in Evacuation of Simulated Emesis.” Ann Emerg Med. 68(4), S123 [research abstract] doi: 10.1016/j.annemergmed.2016.08.335
By |2021-10-29T19:15:35-07:00Oct 31, 2021|Critical Care/ Resus, Tricks of the Trade|
Go to Top