Trick of the Trade: Ultrarapid adenosine push for SVT with a pressure bag

With some things in life, speed is everything. Adenosine is one of those things. With an ultrafast half-life estimated to be between 0.6 to 10 seconds [1], parenterally administered adenosine needs to reach the cells of the AV-node and cardiac pacemaker cells in an expedited fashion to facilitate the termination of supraventricular tachycardias (SVTs).

Known Techniques of Adenosine Administration

Currently, there are 2-syringe and 1-syringe methods that are widely accepted for the administration of adenosine. Recent data suggests that they are non-inferior to each other [2].

Adenosine flush 2 syringe method

Classic 2-syringe method: Benefit = undiluted adenosine to the heart; Limitation = limited by the syringe flush volume [3]

adenosine single syringe method

1-syringe method: Benefit = large volume; Limitation = dilution of adenosine with IV fluid. Read more about the single syringe trick of the trade.

Trick of the Trade: Pressure bag setup

We propose administering undiluted adenosine in an ultra-rapid fashion via an in-line, primed saline tubing with a pressure bag setup.

adenosine iv tubing in y-injection site port

The unique aspect of the trick is to incorporate a high-pressure, unidirectional IV fluid administration system. It is similar to the 2-syringe system except that the flush syringe is replaced with high-pressure IV fluids.

How to set-up

  1. Setup a pressure bag with a primed saline line in the standard fashion.
  2. Close the roller clamp so that no IV fluid is flowing through the tubing.
  3. Attach the IV line to the patient’s angiocatheter.
  4. Attach a syringe with undiluted adenosine to the Y-site port as close to the patient’s IV as possible.
  5. Open the roller clamp to start the high-pressure IV fluid administration.
  6. Rapidly push the adenosine into the tubing.

Video demonstration

In this video, adenosine is the colored fluid for demonstration purposes. Notice how quickly the adenosine reaches the patient.

References

  1. Parker RB, McCollam PL. Adenosine in the episodic treatment of paroxysmal supraventricular tachycardia. Clin Pharm. 1990 Apr;9(4):261-71. PMID: 2184971.
  2. Miyawaki IA, Gomes C, Caporal S Moreira V, et al. The Single-Syringe Versus the Double-Syringe Techniques of Adenosine Administration for Supraventricular Tachycardia: A Systematic Review and Meta-Analysis. Am J Cardiovasc Drugs. 2023;23(4):341-353. doi:10.1007/s40256-023-00581-w. PMID 37162718
  3. Kotruchin P, Chaiyakhan I, Kamonsri P, et al. Abstract 10470: Comparison between the double-syringe technique and the single-syringe diluted with normal saline technique of adenosine for a termination of supraventricular tachycardia: A pilot, randomized, single-blind controlled trial (DO-single trial). Circulation. 2021;144(Suppl_1). doi:10.1161/circ.144.suppl_1.10470

Trick of Trade: Alternative to a Pressure Bag for IV Fluids

pressure bag IV fluids
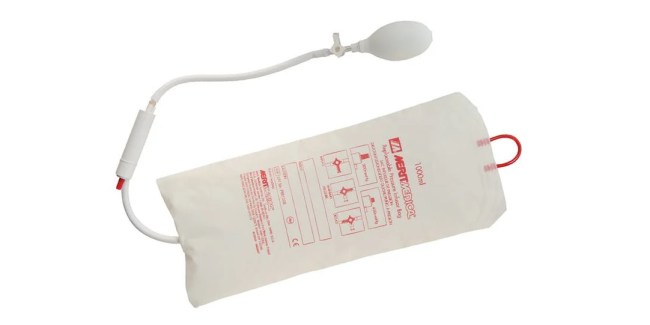
You have a severely dehydrated patient with a peripheral IV line, requiring urgent fluid resuscitation. However, the crystalloid fluids are not flowing freely. Multiple attempts were made to place this line with the latest having a flash of blood return and a smoothly flowing saline flush. You can not seem to find your pressure infusion cuff to squeeze the IV bag and accelerate fluid administration.

Trick of the Trade: Manually provide positive pressure fluids using a 3-way stopcock

  1. Attach a 3-way stopcock between the angiocatheter and IV tubing.
  2. In the unused port, attach a 10 or 20 cc syringe.
  3. Fill the syringe with fluids from the IV bag (turn off flow to the angiocatheter using the stopcock)

Trick of the trade stopcock pressure infusion IV fluids syringe start

  1. Rotate the stopcock 180-degrees and push the syringe fluid into the angiocatheter.

Trick of the trade stopcock pressure infusion end

  1. Repeat this process several times.
  2. After manually pushing 100-200 cc of fluid through the line, turn the stopcock to shut off the syringe port. The fluids should flow more rapidly with gravity alone.

Word of Caution: Syringe Fluid Contaminant

Thanks to Twitter feedback from @cpatrick_89, be careful of introducing bacteria when attaching these pieces to the IV tubing, based on an in vitro study. Wearing gloves helped reduce bacterial contamination [1].

Note that conventional pressure bags may not be readily available in emergency departments and could blow the line you worked hard to secure. This “gentle pressure” technique allows the clinician to gauge how much positive pressure to administer to minimize the risk of fluid extravasation.

Interested in Other Tricks of the Trade?

Reference

  1. Kawakami Y, Tagami T. Pumping infusions with a syringe may cause contamination of the fluid in the syringe. Sci Rep. 2021;11(1):15421. Published 2021 Jul 29. doi:10.1038/s41598-021-94740-1

Trick of Trade: Dual Foley catheter to control massive epistaxis

Massive epistaxis is considered a medical emergency that requires immediate attention. Symptoms of massive epistaxis include sudden and heavy bleeding from the nose, difficulty breathing, dizziness, and a rapid heartbeat. If left untreated, it can lead to significant blood loss, shock, airway obstruction, and even death. We report a case of a 50-year-old man with end stage renal disease with massive nasal bleeding from the left nostril, shortness of breath, and confusion.

Initial Management

After a rapid assessment, we inserted an anterior nasal pack, soaked in epinephrine, TXA, and an antibiotic-based lubricant. However, the bleeding continued from his nares and posterior oropharynx. We thus removed the anterior packing and instead inserted a Foley catheter into the posterior nasal space and inflated the balloon. Unfortunately, the bleeding still continued. Because he presumably had uremia-induced thrombasthenia (weak platelets), he received blood transfusions and IV TXA. And still — he continued bleeding heavily.

Trick of the Trade: Dual Catheter Technique

To provide optimal surface area coverage and tamponade effect of the posterior vessels, concurrent anterior packing is usually needed [1]. You can use commercial devices that have a dual balloon setup, but we did not have that available.

dual balloon for massive epistaxis

Illustration by Dr. Abdelhameed with patient-consented photo of dual balloon technique

Technique

  1. Insert the a 14-French Foley catheter into the nares with the patient’s mouth open (balloon 1). Stop when you see the tip of the catheter dangling in the posterior oropharynx.
  2. Inflate the balloon partially with 15-20 cc of air.
  3. Gently pull the catheter anteriorly until you feel resistance such that the balloon is snuggly positioned.
  4. If the bleeding still continues, insert a second Foley catheter until you meet resistance (balloon 2). Inflate this second balloon with 15 cc of air.

For our case, this dual catheter compression technique succeeded in halting the bleed.

Interested in Other Tricks of the Trade?

Reference

  1. Goralnick E. Posterior Epistaxis Nasal Packing. Medscape. Published Dec 9, 2020

Trick of Trade: Removal of Entrapped Metal Zipper

zipper entrapment injury

A young boy is brought to the pediatric emergency screaming at the top of his lungs by his parents. His penile skin is trapped in the zipper of his jeans. On a busy shift, you want a simple way to handle zipper injuries that minimizes pain, doesn’t require resource-intensive procedural sedation, and is quick.

Background

The 4 most common types of zippers are nylon coil zip, plastic mold zip, metal zip, and invisible zip. Most of the techniques describing solutions on zipper entrapment in the medical literature are derived from case reports and case series. All revolve around understanding zipper anatomy and obtaining adequate exposure to assess how the skin is entrapped. The penile skin often is entrapped either in the sliding mechanism (also known as the endplate) or between the teeth of the zipper.

zipper anatomy

Figure 1. Anatomy of a zipper

Penile Entrapment Injury Management Techniques in Literature

Reported techniques for releasing zippers include [1, 2]:

  • Cut the sliding mechanism (aka the endplate) using metal cutters.
  • Use a flat screwdriver placed underneath the sliding mechanism and rotate it.
  • Use mineral oil for lubrication.
  • Use lateral compression technique to relieve the tension on the trapped skin.
  • Cut the zipper and pull the teeth apart.

All these techniques are associated with variable rates of success. Some of these techniques such as using metal cutters might lead to iatrogenic injuries.

The problem is that the child’s penile skin is entrapped within a metal zipper, where many recommended methods for zipper entrapment removal won’t work.

Trick of the Trade: Removing Metal Zippers

Materials Needed

  • Lidocaine gel
  • Blade or scissors

Technique

  1. The zipper should be separated from the pants as much as possible to minimize painful stretching or pulling of the penile skin.
  2. Apply lidocaine gel on the area of entrapment for 2-3 minutes.
  3. Identify the exposed teeth closest to slider and cut off the zipper at that level (blue dots) while avoiding penile skin (Figure 2).
  4. Gently advance the zipper body forward, pulling either the tab or the body itself, to disengage it from the teeth. You may need to add more lidocaine gel or other lubrication to facilitate this sliding motion.
  5. The remaining parts of the zipper can easily be disengaged from the skin (Figure 3).

metal zipper cut trick zipper entrapment

Figure 2. Cutting off the zipper between the teeth (blue dots) and advancing the zipper body (yellow arrow)

metal zipper entrapped free

Figure 3. Freed zipper body

Interested in Other Tricks of the Trade?

References

  1. Leslie SW, Sajjad H, Taylor RS. Penile Zipper and Ring Injuries. [Updated 2023 Mar 11]. In: StatPearls [Internet]. Treasure Island (FL): StatPearls Publishing; 2023 Jan-.
  2. Tasian GE, Belfer RA. Genitourinary trauma. In: Fleisher and Ludwig’s Textbook of Pediatric Emergency Medicine, 7th ed, Shaw K, Bachur RG (Eds), Lippincott Williams & Wilkins, Philadelphia 2015.

Trick of Trade: Inflating the Esophageal Balloon of a Blakemore/Minnesota Tube without a Manometer 

esophageal balloon manometer trick minnesota blackmore tube

A heavy alcohol drinker, who is well known to your Emergency Department, presents with altered mental status, except that he looks different this time. He looks really bad, stating that he has been vomiting blood. He is hypotensive. He then vomits a copious amount of blood right in front of you. You intubate the patient and initiate the massive transfusion protocol, but everything you pour into him seemingly comes right back out. The gastroenterologist on-call states that he is too unstable for endoscopy. It is time for a balloon tamponade device. You’ve trained for this and set up everything. You call the respiratory therapists (RT) for this mystical “manometer” that you have seen in instructional videos, except that they look puzzled by your request. It is time to MacGyver a method that allows you to know the esophageal balloon pressure that you are generating to avoid an esophageal rupture.

esophageal balloon devices linton sengstaken blakemore minnesota tube

Esophageal Balloon Tamponade Devices – Linton-Nachlas, Sengstaken-Blakemore, Minnesota Tubes (image courtesy of Dr. Mark Ramzy at REBEL EM)

What are esophageal balloon tamponade devices?

There are 2 commonly used devices for tamponading the esophagus during a variceal bleed, the Sengstaken-Blakemore (SB) tube and the Minnesota tube. There is also the Linton-Nachlas tube, but that only has a gastric balloon. The SB tube was created in 1950 in order to help tamponade variceal bleeds [1]. It is a 3-lumen device that has ports to inflate the gastric balloon, aspirate gastric contents, and inflate an esophageal balloon. The Minnesota tube was developed later as a variation to the SB tube and contains an additional port and lumen for aspirating esophageal contents [2]. Another minor difference is that the gastric balloon in the Minnesota tube holds 450-500 ccs of air, while the SB gastric balloon holds 250 ccs of air [2].

Indication: The uncontrolled hemorrhage from esophageal or gastric variceal bleeding after medical or endoscopic treatment fails, is not available, or is not technically possible [3, 4].

Contraindications [4]:

  • Unprotected airway
  • Esophageal rupture (Boerhaave’s syndrome)
  • Esophageal stricture
  • Uncertainty of bleeding site
  • Well-controlled variceal bleeding

Esophageal balloon tamponade devices achieve hemostasis in 60-90% of cases; however, they are only a temporary measure of hemorrhage control because over 50% of variceal bleeds rebleed after deflation [5].

How do you insert these esophageal tamponade devices?

The following instructions are for inserting a Sengstaken-Blakemore (SB) tube [3, 6]:

  1. Pre-measure 50 cm above the gastric balloon and esophageal balloon and mark them on the SB tube.
  2. Fully lubricate the tube.
  3. Insert the tube similar to an orogastric tube until you have reached the 50 cm mark for the gastric balloon
    • Additional trick: You can insert it with a nasogastric tube to have more rigidity and make inserting the tube easier.
  4. Use a slip syringe at the gastric aspiration site and auscultate to confirm that you are in the stomach. Then fill the gastric balloon with 50 cc of air.
  5. Verify the placement of the gastric balloon with a chest x-ray.
    • Additional trick: If the x-ray is delayed, you can pre-check with ultrasound [7]. However final confirmation prior to full inflation should be with a chest X-ray.
  6. Fully inflate the gastric balloon with 200 more ccs of air for a total of 250 ccs.
    • The Minnesota tubes should have the gastric balloon inflated to 450-500 ccs.
  7. Apply traction to the tube by tying a roller bandage to the end of it and then the other end to a 1 L bag of IV fluids. Then hang the roller bandage over an IV pole.
  8. Place the nasogastric tube down to the pre-measured level above the gastric balloon and suction the esophageal space. If there is continued bleeding coming from the nasogastric tube then you will need to inflate the esophageal balloon.
    • Note that Minnesota tubes already have their own esophageal suction port and will NOT need this NG tube placement to suction the esophagus.
  9. Use a “manometer” to inflate the esophageal balloon to 30 mmHg. If bleeding persists, you can go to a maximum of 45 mmHg.

What is this “manometer” typically used for the esophageal balloon?

The manometer referenced in numerous videos [6, 8] is actually a cuff manometer, or pressure gauge, to measure endotracheal cuff pressures. Hence, the RT’s are supposed to have them. In our emergency department, the RTs do not spend a lot of time going around measuring cuff pressures and usually save that until the patient reaches the ICU. It is convenient to use for the inflation of the esophageal balloon because it can inflate and measure pressure at the same time.

Pearl 1: Check the units of pressure being used. Manometers often use cmH2O, while esophageal balloons use mmHg.

  • The conversion rate is: 1 cmH2O = 0.74 mmHg
  • The esophageal balloon goal of 30-45 mmHg is approximately 40-60 cm H2O.

Pearl 2: While the gastric balloon sets a target VOLUME, the esophageal balloon sets a target PRESSURE.

Trick of the Trade: Use a sphygmomanometer as the manometer

Once the inflated gastric balloon is confirmed to be in place, it is time to inflate the esophageal balloon. A manual blood pressure instrument can be repurposed to inflate and measure the esophageal balloon pressure.

  1. Take your manual blood pressure cuff and detach the connections so you have only a plastic tube that runs to the pressure gauge.
  2. Connect this plastic tube end to the male Luer lock of a 3-way stopcock.
  3. Connect the esophageal balloon to a female luer lock on the 3-way stopcock.
  4. Place a 50 cc syringe on the final female Luer lock of the 3-way stopcock.
  5. Turn the 3-way stopcock off towards the pressure gauge and inflate the esophageal balloon with 10 ccs of air.
  6. Then turn the 3-way stopcock off towards the syringe and you should have a reading on the pressure gauge.
  7. Repeat this using small increments (we chose 10 ccs) until you have a pressure reading of 30 mmHg on the pressure gauge. If bleeding continues, you can increase to 45 mmHg.

Video Demonstration: Esophageal Balloon Inflation

References

  1. Sengstaken RW, Blakemore AH. Balloon tamponage for the control of hemorrhage from esophageal varices. Ann Surg. 1950 May;131(5):781-9. doi: 10.1097/00000658-195005000-00017. PMID: 15411151; PMCID: PMC1616705.
  2. Nickson C. Sengstaken–Blakemore and Minnesota Tubes. Life in the Fast Lane • LITFL. Published January 30, 2019.
  3. Powell M, Journey JD. Sengstaken-Blakemore Tube. [Updated 2022 Jun 5]. In: StatPearls [Internet]. Treasure Island (FL): StatPearls Publishing; 2023 Jan-.
  4. Yartsev A. Sengstaken-Blakemore, Minnesotta and Linton-Nachlas tubes. Deranged Physiology. Published July 13, 2015. Accessed April 6, 2023.
  5. García-Pagán JC, Reverter E, Abraldes JG, Bosch J. Acute variceal bleeding. Semin Respir Crit Care Med. 2012 Feb;33(1):46-54.
  6. Mason J. Placement of a Blakemore Tube for Bleeding Varices. EM:RAP HD Videos. Accessed December 17, 2021.
  7. Farkas J. PulmCrit Wee: Ultrasound-guided blakemore tube placement. EMCrit Project. Published May 4, 2016. Accessed April 6, 2023.
  8. Roohollahi A, Suleiman Bilal Rana H, Hadique S. Blakemore Tube Insertion – BAVLS. American Thoracic Society. Published June 1, 2020. Accessed April 7, 2023.

Trick of the Trade: Gel-free ultrasound-guided peripheral IV technique

Ever finally step away from a busy resuscitation and someone stops you for peripheral IV access? You set up everything, have the patient positioned, and then notice there is no sterile ultrasound gel. No gel? No problem. The trick is to eliminate anything of poor acoustic impedance between the ultrasound probe and the patient’s skin.

Trick of the Trade

1. Apply a transparent adhesive dressing with a thin alcohol layer on the probe

Instead of using gel, we squeeze alcohol pads to create a thin alcohol layer and place a transparent adhesive cover, such as Tegaderm ©. The thin alcohol layer serves to eliminate any air bubbles under the adhesive cover as well as minimizes residual adhesive material sticking to the probe when removing the cover. The adhesive cover itself serves as a sterile barrier and a slick surface to improve probe maneuverability. Note that some ultrasound manufacturers do not recommend the use of isopropyl alcohol on their transducers. Therefore check your specific ultrasound’s recommendations before trying [1, 2].

2. Use sterile saline instead of gel on the patient’s skin

Squirt normal saline flush on the patient’s skin to create a coupling medium between the probe and the patient.

Why it works:

Ultrasound procedures use a range of frequencies (1.5-20 MHz) to visualize internal structures and require a medium to replace air, which has a poor acoustic impedance for the ultrasound waves [3]. Acoustic impedance is defined as the resistance of the propagation of ultrasound waves through tissues and is the product of the density and speed of sound in the tissue [4]. Ultrasound gel has an acoustic impedance that is similar to soft tissue and is therefore considered the ideal medium [3]. Because most soft tissue is comprised of water, the acoustic impedance of water, and therefore 0.9% saline, is actually pretty similar [5], as demonstrated by water bath techniques for ultrasounding distal extremity injuries [6].

We find great visual clarity for performing ultrasound-guided peripheral IVs using this trick, as shown in Figure 1.

Peripheral IV ultrasound screen without gel

Figure 1: Peripheral IV ultrasound using alcohol under transparent film dressing and topical saline flush – all without ultrasound gel

Read other Tricks of the Trade articles.

References

  1. Cleaning and Disinfecting FUJIFILM SonoSite Products User Guide [PDF]. Sonosite. 2015. Accessed April 5, 2023.
  2. Disinfectants and Cleaning Solutions for Ultrasound Systems and Transducers [PDF]. Philips. 2021. Accessed April 5, 2023
  3. Afzal S, Zahid M, Rehan ZA, et al. Preparation and Evaluation of Polymer-Based Ultrasound Gel and Its Application in Ultrasonography. Gels. 2022 Jan 6;8(1):42. doi: 10.3390/gels8010042. PMID: 35049577; PMCID: PMC8774352
  4. Suzuko S, Peter G, Philipp L. 20 – Local Anesthetics, Ed(s): Hugh C. Hemmings, Talmage D. Egan, Pharmacology and Physiology for Anesthesia (Second Edition), Elsevier, 2019, Pages 390-411, ISBN 9780323481106. DOI: 10.1016/B978-0-323-48110-6.00020-X
  5. R. Alkins, K. Hynynen, 10.08 – Ultrasound Therapy, Editor(s): Anders Brahme, Comprehensive Biomedical Physics, Elsevier, 2014, Pages 153-168, ISBN 9780444536334. DOI 10.1016/B978-0-444-53632-7.01010-8
  6. LeDonne S, Sengupta D. US Probe: Ultrasound Water Bath for Distal Extremity Evaluation. Alerhand S, Singh M, editors. emDOCs.net – Emergency Medicine Education. 2017.
By |2023-04-06T20:53:38-07:00Apr 12, 2023|Radiology, Tricks of the Trade, Ultrasound|

Trick of the Trade: Chest tube rewarming with Foley tubing connector

You have a pulseless hypothermic patient requiring aggressive internal rewarming. ECMO is not available, and you’ve made the decision to initiate thoracic lavage. After placing your chest tubes, you step back triumphantly, but in short order, the nurse hands you large diameter IV tubing with warmed fluids so that you can connect it to the chest tube. You are left with the IV tubing in one hand and a chest tube in the other with no time to waste, but no elegant or straightforward solution to interface the two.

Trick of the Trade

Using Foley bag tubing

The tube from a standard Foley bag, available in all emergency departments, contains a Luer lock near the tapered nozzle. This unique connector setup allows you to instill warm fluids into the thoracic space with minimal spillage.

rewarming hypothermia IV tubing chest tube foley tubing

Technique for Rewarming

  1. Attach the warmed IV fluids to the Luer lock port on the Foley bag tubing.
  2. Insert the tapered nozzle on the Foley bag tubing (typically interfaces with the urine drainage port of the Foley catheter) into the chest tube.
  3. Clamp the remainder of the Foley bag tubing just proximal to the Luer lock to minimize backflow of IV fluids into the bag.
  4. Optional: Cut the tubing proximal to the clamp to declutter the space around the interface.
  5. Instill warm fluid through one chest tube and drain it from the adjacent chest tube.
  6. Continue rewarming resuscitation protocols.
Chest tube connected to IV tubing via Foley bag tubing

IV tubing connected to chest tube via Foley bag tube (left photo is a closeup view with arrow designating IV fluid flow)

Read other Tricks of the Trade posts.

Go to Top